[Blender→Unity] FBX Scale Becomes 100 and Colliders Grow 100x: Cause and Fix
Published: September 20, 2026
For: Anyone whose FBX from Blender shows Scale 100 in Unity, with colliders or child objects at the wrong size
The problem
You export a model from Blender and import it into Unity, and the Armature's Scale is 100. The model itself looks the right size, but a collider attached to a bone ends up 100 times larger.
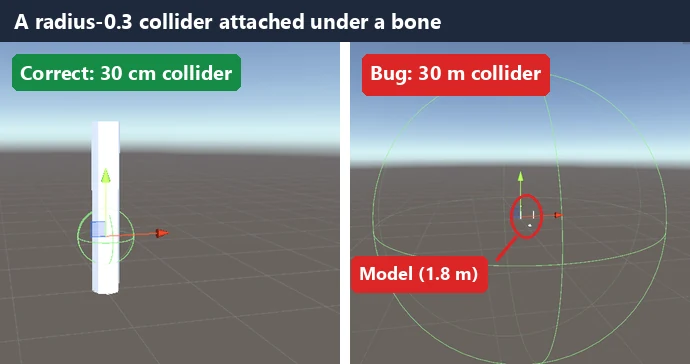
Clicks and raycasts start hitting places that have nothing to do with the model.
Cause
Blender's default export (Apply Scalings: All Local) writes the FBX in centimeters. Unity scales the file by 0.01, and Blender compensates by putting a scale of 100 on the objects, so 100 remains in the Transform.
Fix
- In Blender, apply the scale with Ctrl+A → Scale first, then set Apply Scalings to FBX All in the FBX export
- After importing into Unity, check that the import settings show "1m (File) to 1m (Unity)" next to Convert Units
Environment
| Item | Version |
|---|---|
| Blender | 5.0.1 (English UI) |
| Unity | 6000.0.58f2 (Unity 6, English UI) |
| Test model | 1.8 m tall cylinder + 3 bones (Bone0-2) skinned with automatic weights |
Fix in detail: exporting with Scale 1
The steps below show, on the actual screens, how to export an FBX that comes into Unity with Scale 1. After that, you will find the steps to reproduce the problem.
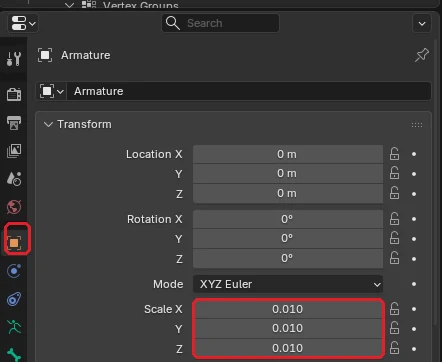
Step 1: Check that the object scale is 1
Select the armature (and the mesh) and check Scale under Transform in the Properties editor at the bottom right. If anything other than 1.000 (such as 0.010) is left, apply it in Step 2.
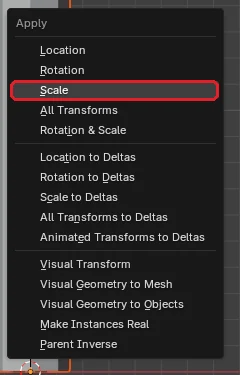
Step 2: Apply the scale with Ctrl+A → Scale
With the mouse over the 3D Viewport, press Ctrl+A and choose Scale in the Apply menu. The scale becomes 1.000 and the model keeps its size. If the scale was already 1 in Step 1, you can skip this step.
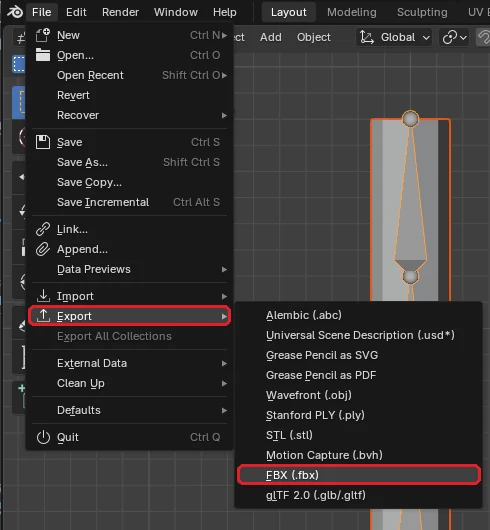
Step 3: Open File → Export → FBX
From the File menu at the top left, hover over Export and choose FBX (.fbx).
Step 4: Set Apply Scalings to FBX All
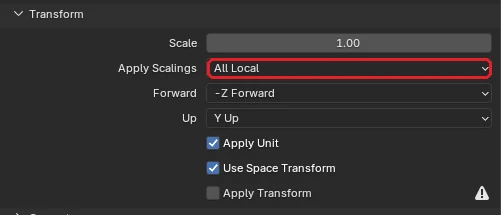
On the right side of the export window, Apply Scalings in the Transform panel is set to All Local by default. Open the drop-down and choose FBX All.
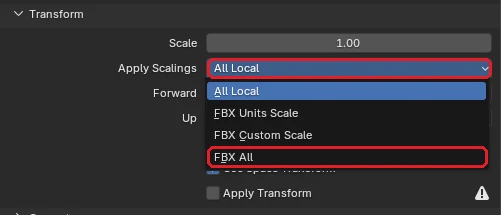
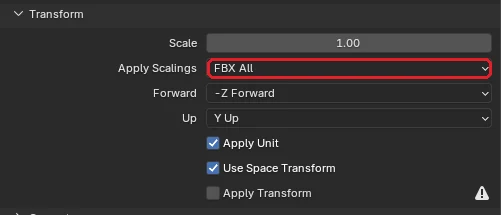
FBX Units Scale gave the same result in our tests.
Step 5: Click Export FBX
Enter a file name at the bottom and click Export FBX at the bottom right.

Check 1: Unity's import settings show "1m (File) to 1m (Unity)"
Put the exported FBX in Unity's Project window, select it, and look at the Model tab in the Inspector. If it says "1m (File) to 1m (Unity)" next to Convert Units, no unit conversion is happening.
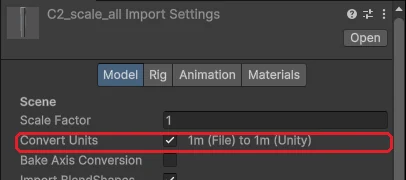
Check 2: The Armature's Scale is 1
Place the FBX in the scene and select Armature. If the Transform scale is 1, you are done.
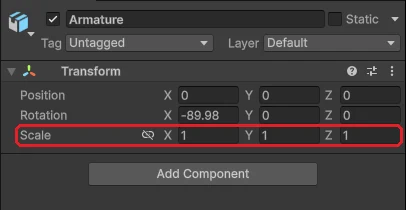
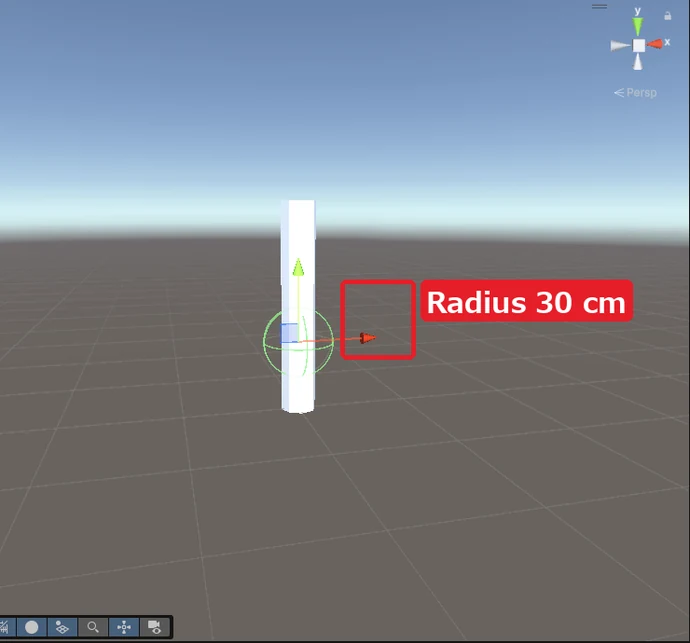
A radius-0.3 Sphere Collider attached under a bone now stays at the intended 30 cm radius.
Reference: exporting from a script
In a script, Step 2 is transform_apply and Step 4 is apply_scale_options.
import bpy

armature = bpy.data.objects["Armature"]
body = bpy.data.objects["Body"]

bpy.ops.object.select_all(action='DESELECT')
armature.select_set(True)
body.select_set(True)
bpy.context.view_layer.objects.active = armature
bpy.ops.object.transform_apply(location=False, rotation=False, scale=True)  # Step 2

bpy.ops.export_scene.fbx(                     # Steps 3-5
    filepath="model.fbx",
    use_selection=True,
    apply_scale_options='FBX_SCALE_ALL',      # Step 4: Apply Scalings = FBX All
)
Reference: with 0.01 left on the object, FBX All gives Scale 0.01
If you skip Step 2 and export with FBX All while a scale of 0.01 is still on the object, the Armature's scale becomes 0.01 instead. A collider under a bone shrinks to 1/100, so a radius of 0.3 becomes a 3 mm hitbox.

For comparison, exporting the same model with the default All Local made 0.01 and 100 cancel out, and the Armature's scale came out as 1. If you switch to FBX All, always apply the scale in Step 2 as well.
Reference: turning off Convert Units in Unity really makes the model huge
If you uncheck Convert Units in Unity's import settings, the "1 unit = 1 cm" in the FBX is ignored.

Doing this with an FBX exported at the default settings leaves only the 100x on the Transform, and the model becomes 180 m tall.

If your model is too big to fit in the camera, check this box before you look at Blender's export settings.
Cause in detail: the FBX is written in cm and Unity compensates with 100x
You can reproduce the problem with the following steps.
Reproduce 1: Export with Apply Scalings left at All Local
Open File → Export → FBX and export without changing Apply Scalings from All Local.
Reproduce 2: Import into Unity and select the Armature
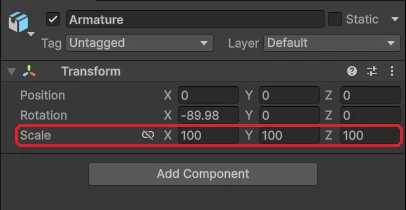
Place the FBX in a Unity scene and select Armature. The Transform scale is 100 on X, Y and Z. The model still looks 1.8 m tall, not huge.
Reproduce 3: Attach a collider under a bone
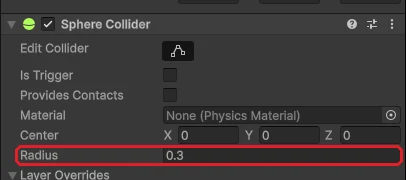
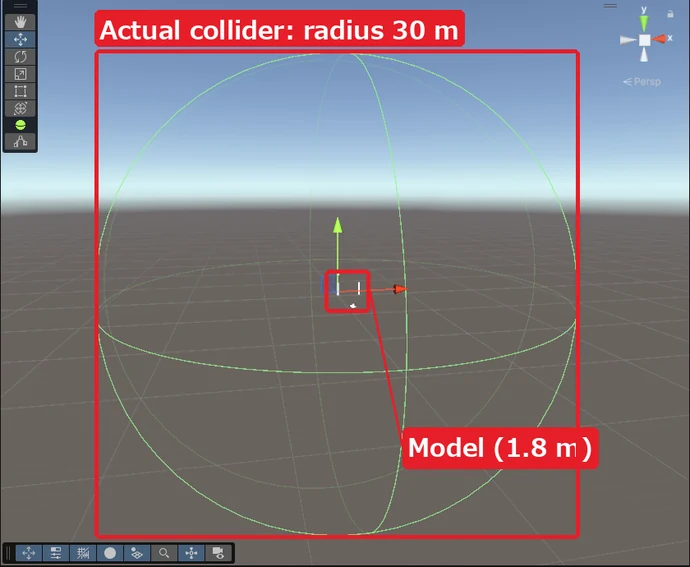
Add a Sphere Collider as a child of Bone1 and set its radius to 0.3 (meant to be 30 cm).
In the Scene view, the collider is a sphere with a 30 m radius. The model itself is a small dot at the center.
Why the scale becomes 100
Select the FBX in the Project window and the Model tab of the import settings appears in the Inspector. Comparing the text next to Convert Units for two FBX files makes the difference clear.

Blender's default export writes "1 unit in this file = 1 cm" into the FBX (UnitScaleFactor is 1.0 inside the file). Unity reads it and scales everything by 0.01. The vertex and bone positions, however, are still written in meters, so the model would end up 1/100 of its size. Blender cancels that out by putting a scale of 100 on the objects.
The visible size works out as 0.01 × 100 = 1. But 100 stays on the Transform of Armature and Body, so anything you put under them is scaled 100 times. That is why the collider became 30 m.
With FBX All, the FBX says "1 unit = 1 m" (UnitScaleFactor is 100.0), and Unity neither shrinks nor enlarges it.
Reference: measured results by condition
We exported the same rig under different conditions and imported each into Unity 6 with default import settings. "Condition" is Blender's Apply Scalings, "Units" is the conversion shown in Unity's import settings, and "Collider" is the actual radius of a radius-0.3 Sphere Collider placed under a bone.
| Condition | Units | Armature scale |
Height | Collider |
|---|---|---|---|---|
| All Local (default) | 1cm→0.01m | 100 | 1.8 m | 30 m |
| FBX All | 1m→1m | 1 | 1.8 m | 0.3 m |
| FBX Units Scale | 1m→1m | 1 | 1.8 m | 0.3 m |
| 0.01 left + All Local |
1cm→0.01m | 1 | 1.8 m | 0.3 m |
| 0.01 left + FBX All |
1m→1m | 0.01 | 1.8 m | 3 mm |
| All Local + Unity Convert Units off |
none | 100 | 180 m | 30 m |
"0.01 left" means the object still had a scale of 0.01 when it was exported.
Under every condition, the Armature's Rotation X stayed at -89.98 (or 89.98). This rotation absorbs the difference between Blender's Z-up and Unity's Y-up axes and does not affect how the skinned mesh is displayed. Turning on Blender's Apply Transform set Body's rotation to 0, but the Armature's rotation remained.
Summary
- Scale becomes 100 because the default export writes the FBX in centimeters, and Unity's 0.01x is canceled out by a 100x on the objects
- The model looks the right size, but colliders and child objects under the bones become 100 times larger
- Apply the scale with Ctrl+A and export with Apply Scalings: FBX All to get Scale 1 in Unity
- After importing, check that the import settings say "1m (File) to 1m (Unity)". Keep Convert Units on
Missing bones are a separate problem with a different cause and fix. See [Blender→Unity] Bones Missing After FBX Export: Cause and Fix.
Models built with this pipeline run in Pose Mirror, a free tool that turns a photo into a 3D pose.
A model imported with these FBX settings, running in the browser.
The quickest way to check a Blender→Unity setup is to rotate the real thing.
▶ Open the 3D drawing mannequin that uses this model